Using a Kids Room Frame Mockup: What Most Creators Get Wrong
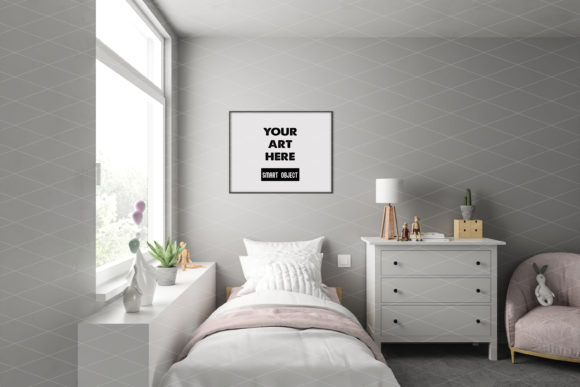
If you have ever tried to sell artwork online, you already know that a flat digital image rarely does justice to your work. Customers struggle to imagine how a piece will look on their own wall, especially in a space as personal as a child's bedroom. This is where a well-designed mockup makes all the difference. The Frame_Mockup_Kids_Room gives you a ready-made interior scene with a movable, scalable frame into which you can drop your own artwork. It sounds simple, and it can be. But there are several mistakes people make when using this kind of product, and those mistakes can quietly undermine the quality of your presentation, waste your time, and even cost you sales. Let us walk through what to watch for and how to get it right the first time.
Mistaking the File Format for a Simple Image
One of the most common misunderstandings is treating the layered PSD file as if it were a flat JPEG. The Frame_Mockup_Kids_Room is delivered as a layered Photoshop file that includes a smart object layer. That smart object is the key to everything. If you open the file and try to paste your artwork onto the frame using standard copy-paste without double-clicking the smart object thumbnail, you will break the layer structure. The result is a distorted image that cannot be moved or scaled properly afterward.
Instead, open the file in Photoshop or a compatible editor like Photopea. Locate the smart object layer in the layers panel. Double-click its thumbnail. A new window will open containing a placeholder image. Replace that placeholder with your own artwork, then save. When you close that window, the main file updates automatically. Your artwork now sits inside the frame, fully editable. This single workflow step saves you from hours of frustration.
Ignoring the Positioning and Scale Controls
Even after you have placed your artwork inside the smart object, you still have full control over where it appears on the wall. Many users insert their image and stop there. They do not realize they can move the frame horizontally or vertically and scale it up or down to fit the composition of the room. The result is a piece that looks oddly placed, too large, or too small for the surroundings.
In Photoshop, select the layer containing the frame and use the Move tool to reposition it. To adjust size, press Ctrl+T (or Cmd+T on Mac) to activate the Transform tool. Drag the corner handles while holding Shift to maintain proportions. This is not just a nice-to-have feature. It is how you ensure your artwork looks natural in the space. A piece that hangs too high or too low distracts the viewer and undermines the realism of the mockup. Take the extra thirty seconds to fine-tune the placement.
Working with a Free Editor Without Checking Compatibility
Not everyone owns a full Photoshop subscription, and that is perfectly fine. The Frame_Mockup_Kids_Room is compatible with free online editors that support PSD files, such as Photopea. However, not all free editors handle smart objects the same way. Some flatten layers upon import. Others distort the file structure. Before you invest time creating a whole series of mockups, test the file in your chosen editor first.
Open the PSD in Photopea. Locate the smart object layer and double-click to confirm it opens a new tab. If the editor does not support smart objects, you will see a warning or the layer will appear locked. In that case, switch to an editor that does support them. Photopea is a strong choice because it mimics Photoshop's layer behavior closely. But always verify early, not after you have already placed your artwork. A quick test saves you from redoing work later.
Overlooking the Benefits of Multiple Frames
The product description states that you can create an unlimited number of frames. Many users interpret this as permission to use the same file repeatedly without adjusting anything. That is a missed opportunity. The real value lies in being able to show the same piece of artwork in different positions, at different scales, or in multiple rooms. For example, you might create one version where the frame sits above a crib and another where it hangs above a small desk. Each version tells a different story to your customer.
To do this effectively, duplicate the smart object layer before making changes. Right-click the layer in the layers panel and choose Duplicate Layer. Then double-click the duplicate's smart object to insert a different artwork, or keep the same artwork but reposition the frame. This way you build a small library of realistic scenes from a single source file. Your customers see how versatile your artwork is, and you get more mileage out of the mockup.
Forgetting the Context of the Interior Background
The background of the Frame_Mockup_Kids_Room is not just decoration. It sets the mood, the color palette, and the age range for the room. A common mistake is to use the same mockup for every type of artwork without considering whether the background matches the tone of the piece. A bright, playful background suits children's illustrations and nursery prints. A more neutral or muted background might work better for minimalist designs or black-and-white art.
If your artwork clashes with the background, the entire presentation feels off. The viewer may not consciously know why, but they will sense the disconnect. If you cannot change the background layer, at least choose a frame position that minimizes the visual friction. Place the frame against a section of the wall that complements your artwork's color scheme. Small adjustments in positioning can make a big difference in how harmonious the final image looks.
Skipping the Save-and-Test Workflow
After you place your artwork and adjust the frame, save the file as a JPEG or PNG for your shop, blog, or social media. But do not stop there. Open that exported image on a real screen, preferably the same type your customers will use. Look at it on a phone, on a tablet, and on a desktop monitor. What looks crisp and well-proportioned in Photoshop may appear too small, too dark, or oddly cropped on another device.
This step catches errors before they reach your audience. You might notice that the frame edges are cut off at certain screen sizes, or that the resolution drops when you scale the frame too large. Go back to the PSD, adjust the artwork positioning, and re-export. A few minutes of testing prevents weeks of underperforming visuals on your product listings.
Treating the Mockup as a One-Time Resource
A layered PSD with a smart object layer is reusable by design. Yet many creators use it once, export an image, and never open the file again. They then search for a new mockup when they need a different presentation. That is wasteful. The Frame_Mockup_Kids_Room can be used multiple times, with different artwork, at different scales, and in different positions. Keep the original file in a dedicated folder. When you have new artwork to showcase, open that file, replace the smart object content, adjust the frame, and export. You get a fresh presentation in minutes without downloading anything new.
To stay organized, name your exported files by artwork title and frame position. That way you can quickly find the version you need later. A small naming convention saves you from opening dozens of files to locate the right one.
Choosing the Right Mockup for the Right Audience
The kids room mockup is clearly designed for children's spaces, but that does not mean every piece of children's artwork belongs in it. Consider the age of the child your buyer is shopping for. A nursery mockup with soft pastels fits baby shower gifts and newborn prints. A mockup with brighter colors and toy elements suits toddler and preschool artwork. If your product line includes art for older children or teenagers, this particular mockup may feel too young. Read the room, literally. Match the mockup's interior style to your target customer's expectations.
If you are unsure, ask yourself: would a parent of a ten-year-old feel this room represents their child's space? If the answer is no, consider a different mockup or use this one only for your younger age-range products. Misalignment between the mockup and the audience can make your shop feel inconsistent.
Practical Summary for Better Results
Using a kids room frame mockup well does not require advanced design skills. It requires attention to a few key details: open the smart object correctly, position and scale the frame deliberately, test your exports on real devices, and reuse the file for multiple pieces. Avoid the common pitfalls of ignoring layer structure, skipping compatibility checks, and treating the background as unimportant. When you approach the mockup with intention, you produce images that look professional, build trust with your customers, and ultimately help your artwork sell itself.